USER MANUAL- ICO Stainless Steel Whipped Cream Dispenser
It Really Helps :)
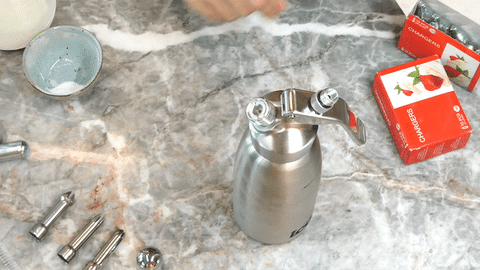
MENU
PRIOR TO FILLING:
1. REMOVE protection cap from headset. (Whipper arrives with protection cap on)

2. PISTON and VALVE must be tightly screwed in place

3. SILICON GASKET must be inserted tightly in headset

FILLING:
4. FILL dispenser with 1 Pint/0.5L or less of heavy cream or other preparation.
**DO NOT OVERFILL (Remaining empty space is required for optimum aeration).
**DO NOT POUR in liquids at temperature higher than 104°F/40°C

5. ADD sweetener and fully dissolve to avoid obstruction to the piston.
**Solid ingredients such as granulated sugar, coarse spices, fruits, and vegetables must be passed through a fine sieve before pouring into device

6. SCREW headset onto bottle (tightly) and shake bottle to mix in sweetener

7. INSERT (1) 8g N2O cartridge into charger holder and SCREW on until you all contents of charger release into bottle (a “sss” will be heard).
**DO NOT USE more than one cartridge at a time and ONLY CHARGE with 8g N2O, 8g CO2, or 2g N2 cartridges
**DO NOT LEAN your body over device when charging or POINT a pressurized whipper at yourself or others

8. UNSCREW charger holder and discard empty cartridge (a small amount of gas WILL escape when unscrewing)
**DO NOT USE device with charger holder still attached.

9. SHAKE dispenser slowly but sternly from 8 to 20 times. This ensures gas thoroughly incorporates with the cream to ‘whip’ it.
**The number of shakes directly affects the consistency of the preparation. The more shakes the stiffer the preparation will be when dispensed.
|
Type of Cream |
Fat Content |
Required # of Shakes |
|
Fresh Cream Non-perishable or low-fat cream |
33% - 36% 30% - 32% |
8-12 15-20 |

10. SCREW protector cap back on and a decorator tip onto dispenser valve.
11. CHECK for desired consistency after 8 shakes. TURN device upside down (with decorator tip in vertical position) and press lever slightly. DO NOT press lever fully as it will cause the cream to ‘shoot’ out.
- If cream is still soft, continue with another one or two shakes and check for consistency again. Repeat until you get the desired consistency.
- DO NOT OVER-SHAKE, as it can make the cream too stiff and cause very little to be dispensed with the rest remaining in the canister.

- Perfect on Coffee!

STORING:
12. STORE in fridge for up to 14 days. DO NOT store a pressurized dispenser on its side.
CLEANING:
13. CLEAN dispenser after each complete use (when all preparation is used).
- DEPRESSURIZE device before opening to clean: Hold upside down and depress lever until whipper is completely empty. DO NOT open device if it has any pressure.
- REMOVE headset carefully. DO NOT point it towards yourself or anyone else while removing
- REMOVE parts of headset: decorator tip, silicon gasket, piston, and valve. USE included cleaning brush and warm water and soap to remove all fat or protein residues

14. Stainless-steel dispensers (ICO004, ICO005) can be washed in a dishwasher up to 100°C. DO NOT put a stainless-steel headset in the dishwasher.
TIPS for Warm Preparations:
- When preparing warm preparations, heat the liquid before pouring it into the dispenser. DO NOT use liquid over 40°C/104°F. Device WILL get warm when warm preparation is inside.
- DO NOT HEAT A PRESSURIZED DISPENSER.
- Aluminum dispensers can be kept warm until pressurized in a double boiler or baine marie, up to a maximum temperature of 40°C/104°F
If you have any issues with our product please let us know.
Recommend us to a friend on impeccable-O.com